Creating your own makeup brush holder is both a fun craft project and a practical solution to organizing your beauty tools. For those who love DIY projects and want a personalized touch to their vanity, making a brush holder at home provides a customized storage option that suits your style and needs. This hands-on approach not only keeps your brushes tidy but also helps protect them, extending their lifespan and ensuring your makeup application is always flawless. With materials easily found at home or craft stores, even beginners can enjoy constructing a makeup brush holder that blends functionality with charm, making daily routines more streamlined and enjoyable.
DIY makeup brush holders range from simple fabric rolls to more elaborate organizer stands, enabling versatility in style and use. The project can be an ideal gift idea, especially around holidays, offering something handmade yet useful for makeup enthusiasts. Moreover, these organizers contribute to sustainability by reducing the need for store-bought plastic holders and offering washable options, promoting eco-friendliness in beauty routines.
As beauty spaces evolve, personalized organization systems have become essential. Whether you desire a compact holder for travel or a decorative piece for your vanity, making your own brush holder adds character and convenience to your daily beauty ritual. Below, you’ll find detailed guides and creative ideas to inspire your next DIY beauty organizer project.
In brief:
- DIY makeup brush holders combine style and storage efficiency, ideal for both vanity display and travel.
- Fabric brush rolls are a popular beginner sewing project offering portability and easy cleaning.
- Custom pockets can accommodate various brush sizes, protecting bristles and maintaining shape.
- Making your own holder is eco-friendly, reducing plastic waste and supporting sustainable beauty habits.
- These projects make thoughtful handmade gifts with a personal touch for beauty enthusiasts.
Essential Materials and Preparation for Homemade Makeup Brush Holders
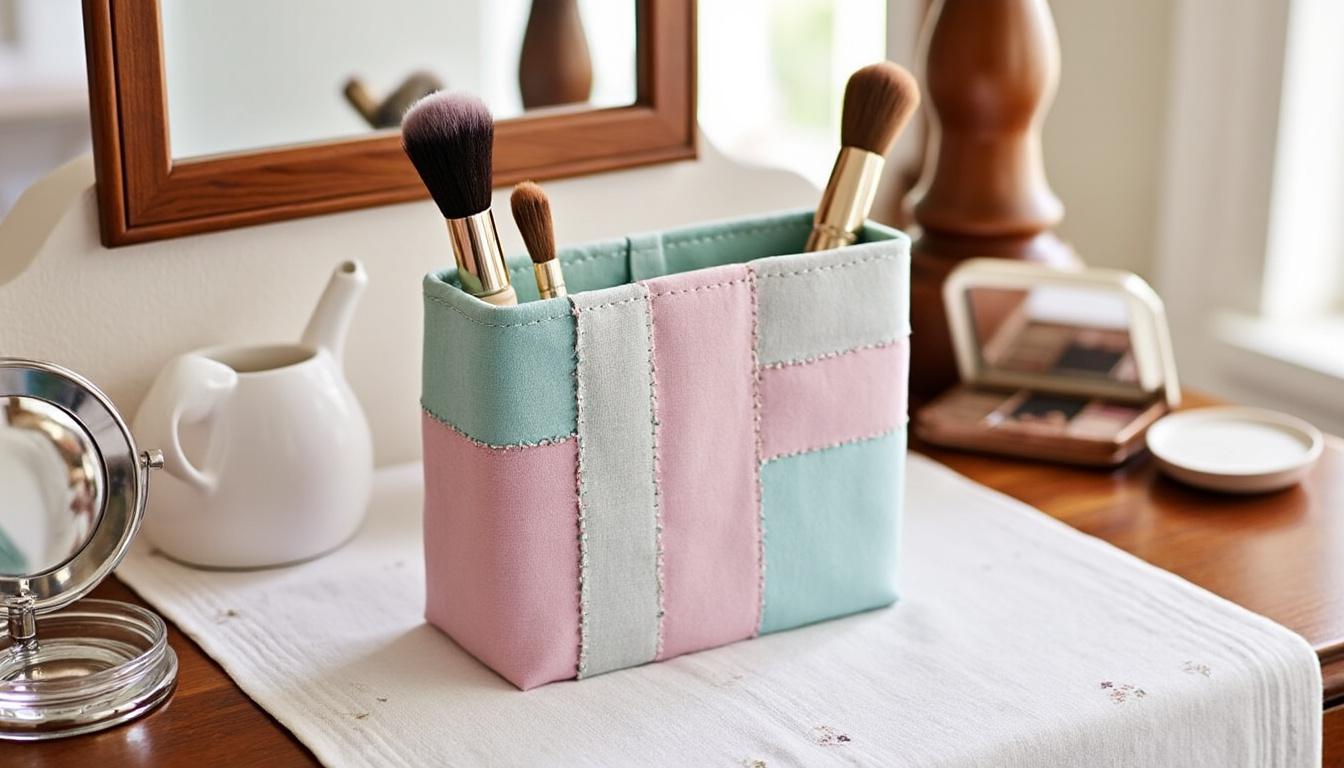
Before embarking on your DIY makeup brush holder project, gathering the right materials and prepping the workspace are crucial steps. Usually, medium-weight cotton fabrics suit this craft perfectly due to their durability and ease of cleaning. Choosing two coordinating fabrics—a primary fabric for the outer shell and another for the brush pockets—adds aesthetic contrast and functionality.
Additional supplies often include sewing notions such as thread matching the fabric, a sewing machine for sturdiness, and ribbons or seam bindings to secure the holder when rolled. A creative touch might involve mixing patterns or colors to complement your personal style or the décor of your vanity. For example, floral prints combined with solid tones can create charming, elegant brush holders that look as good as they perform.
Cutting precise fabric pieces according to patterns ensures a polished finish. Typically, outer and lining fabrics are cut into pieces approximately 18 by 14 inches, with the pocket piece slightly wider to hold brushes of varying sizes. Using fusible interfacing on the outer fabric adds structure, preventing the holder from becoming too floppy while maintaining flexibility. Meanwhile, cotton batting inserted between fabric layers provides cushioning, protecting delicate brush bristles and handles from damage.
Setting up a clean and well-lit workspace will facilitate precise sewing and cutting, essential for neat edges and well-constructed pockets. Emphasizing attention to detail in this preparation phase sets the tone for a successful project and long-lasting use.
Step-by-Step Guide to Sewing a Functional Brush Roll Organizer
Sewing a brush roll is an accessible and rewarding project, particularly suited for beauty enthusiasts looking for practical storage with a homemade feel. The process starts by pressing the pocket fabric’s top edge for a clean finish, then securing it onto the back piece by topstitching. This pocket will cradle the brushes, so stitch lines that create individual compartments to hold brushes of different sizes securely is key.
After layering the fabric pieces in the correct order—pocket on one main piece and the other fabric piece placed face-down on top—the ribbon is placed near the pocket edge. This ribbon will function as the tie for the holder once rolled. Stitching around with a small opening left for turning the fabric’s right side out completes the main structure.
Turning the brush roll right side out, pressing flat, and topstitching around closes the opening perfectly and gives it a professional finish. The final step involves sewing vertical lines through the pocket section at 1½-inch intervals or varied widths to accommodate your brush collection. Rolling the organizer and tying the ribbon keeps brushes neat and secure, ideal for storage or travel.
Besides functionality, this design offers portability and neatness, as the roll can be compactly stored in drawers or suitcases. The following table summarizes materials and tools required for this beginner-friendly project:
| Materials | Approximate Quantity |
|---|---|
| Main fabric (cotton) | 2 pieces, 20″ x 10″ |
| Pocket fabric | 1 piece, 6″ x 20″ |
| Ribbon or seam binding | About 2 feet |
| Coordinating thread | As needed |
| Sewing machine and needles | 1 |
For detailed patterns, tips, and a handy tutorial, exploring creative solutions like those from DIYsCraftsy can guide crafters through the step-by-step process seamlessly.
Helpful Tips for a Perfect Sewing Outcome
- Use pins to mark where brush pockets will be sewn to maintain even spacing.
- Try contrasting thread colors for decorative topstitching accents.
- Reinforce stitches at the beginning and end of lines for durability.
- Choose durable, washable fabrics to ensure your holder remains fresh and clean.
Creative Variations: Designing Unique Brush Organizers to Suit Personal Style
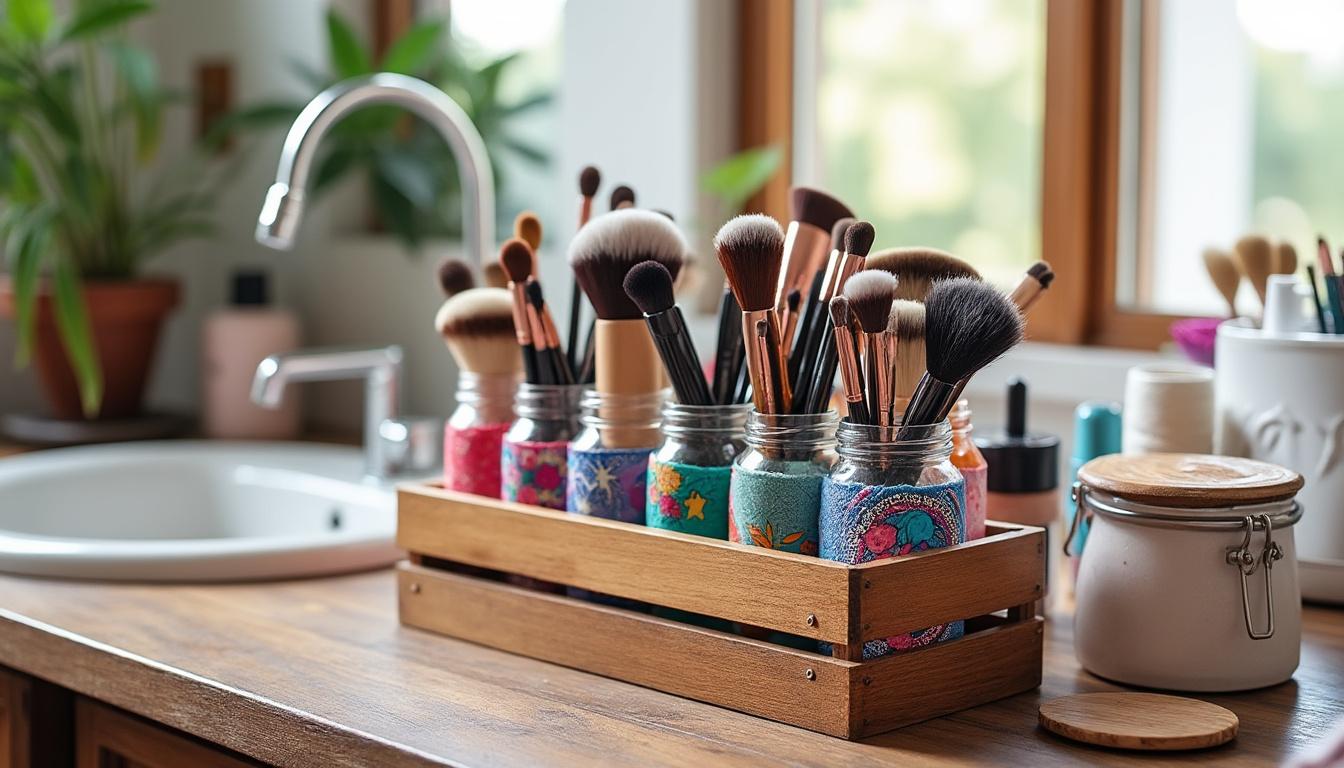
Beyond the classic brush roll, countless inventive ideas exist for creating makeup brush holders that elevate both beauty and organization. From repurposing everyday items to sewing specialized fabric holders, these variations cater to different needs and aesthetics.
One popular concept is transforming household containers such as mason jars, candle holders, or even wooden blocks into chic brush stands. Painting or decorating these with personalized motifs can turn simple holders into centerpiece art, combining beauty with utility. DIY projects featured on Single Girl’s DIY demonstrate how dollar store materials morph into stylish storage solutions swiftly and affordably.
Fabric holders with zippers or snap closures offer added protection against dust, making them perfect for commuters or travelers. These designs may incorporate additional pockets for makeup essentials, combining a brush holder with a small makeup bag in one. Decorative ribbons, lace trims, or embroidery can personalize the holder’s exterior, transforming it into a fashionable statement piece.
For crafters looking to challenge their skills, sewing a tri-fold brush organizer is an engaging project. It folds neatly like a wallet and employs slots to keep brushes upright and accessible. Such designs require precision and patience but result in elegant, space-efficient organizers. The versatility of these ideas allows each person to tailor their brush holder around their unique routine and style preferences.
Fashion meets utility in these homemade organizers, proving that a little creativity enhances the daily ritual of makeup application while maintaining order.
Maintaining and Caring for Your DIY Makeup Brush Holder
To ensure your handmade brush holder remains beautiful and functional, proper maintenance is just as important as its construction. Many DIY holders, especially those sewn from washable fabric, can be cleaned regularly to avoid makeup residue buildup or dust accumulation. Washing instructions vary but typically include gentle machine wash or spot cleaning, depending on fabric choice and construction details.
Roll-up fabric holders benefit from occasional laundering to maintain hygiene and appearance. Before washing, close any ties or fasteners to prevent snagging, and use mild detergents to preserve fabric vibrancy. After washing, reshape the holder while damp and air dry flat or hung to avoid wrinkles and distortion.
For holders made from harder materials like wood or glass, surface cleaning with a damp cloth or gentle cleanser suffices. Avoid abrasive products that might damage decorative finishes. Regularly clearing brushes before storing them keeps both the tools and their holder cleaner for longer.
Caring for your DIY makeup brush organizer not only protects your investment but also reflects the importance of skin care hygiene, ensuring your brushes and storage space remain sanitary. Good upkeep extends the life of both brushes and holders, keeping your routine effortless and enjoyable.
Key Maintenance Practices for Long-lasting Use
- Wash fabric holders every few weeks or after heavy use.
- Spot clean small stains immediately to prevent permanent marks.
- Keep brushes clean before storing to reduce residue transfer.
- Protect delicate trim and ribbons by handwashing if needed.